11. Vendor Management
NB: Vendor management is a separate feature - it is only available for licensed users. Your installation may or may-not have this.
Here we can manage transactions, shipping details, and result files between a vendor and x-number of clients.
11.1. Setup
Before we can use the ‘Vendor Management’ section, we need to perform some administrative setup tasks.
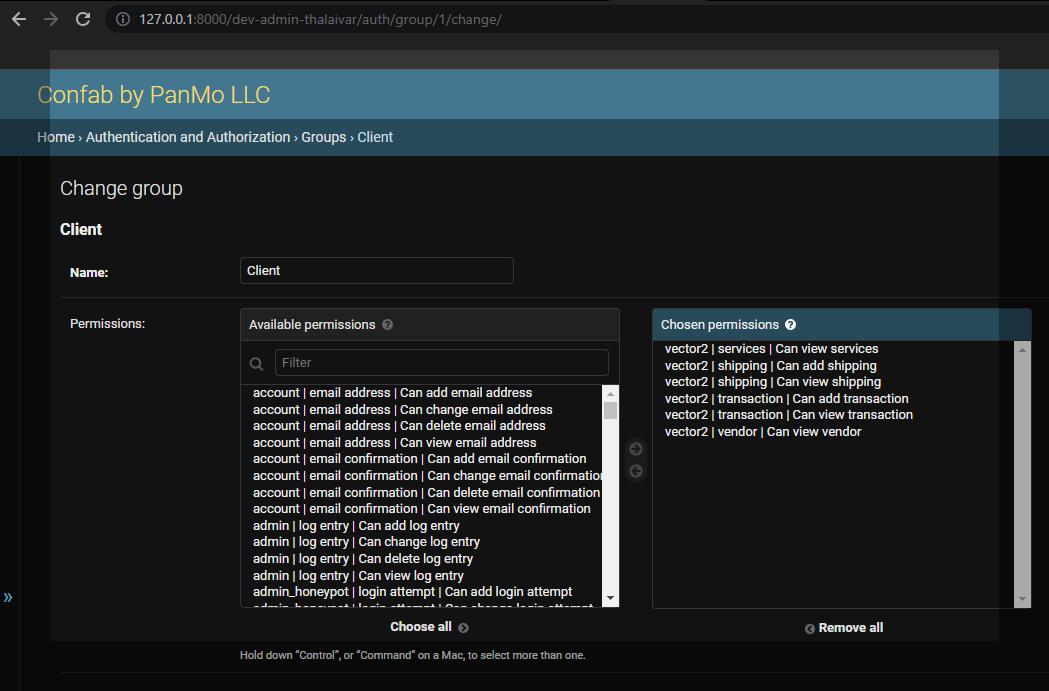
The first thing that needs to be done is to add a group called ‘Client’ and assign it any permissions we want the clients to be able to perform. You can see in the image below the set of core permissions we recommend.
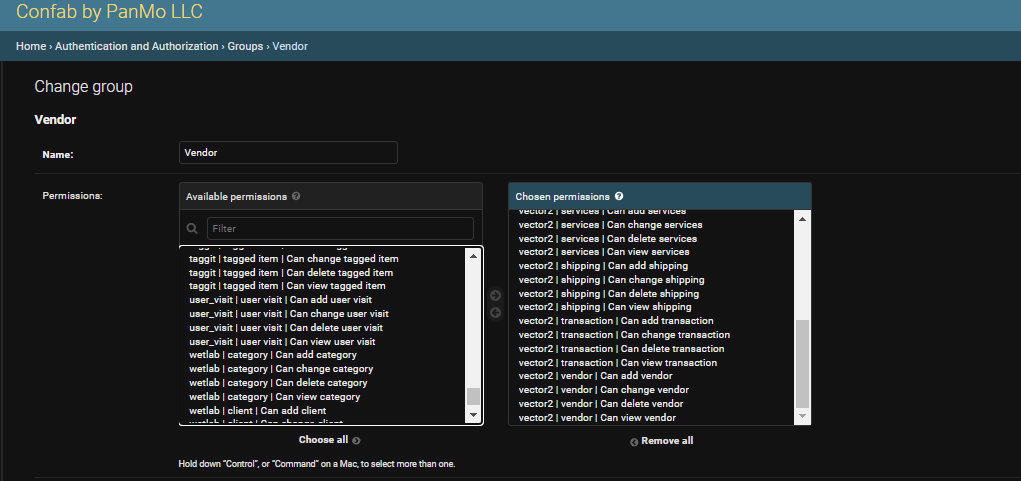
Now that we have added the base Client group, we need to create a group for us vendors. With this group, assign all vector2 permissions. After this is done, whatever user such as yourself you place in will have full access to the vendor management features.
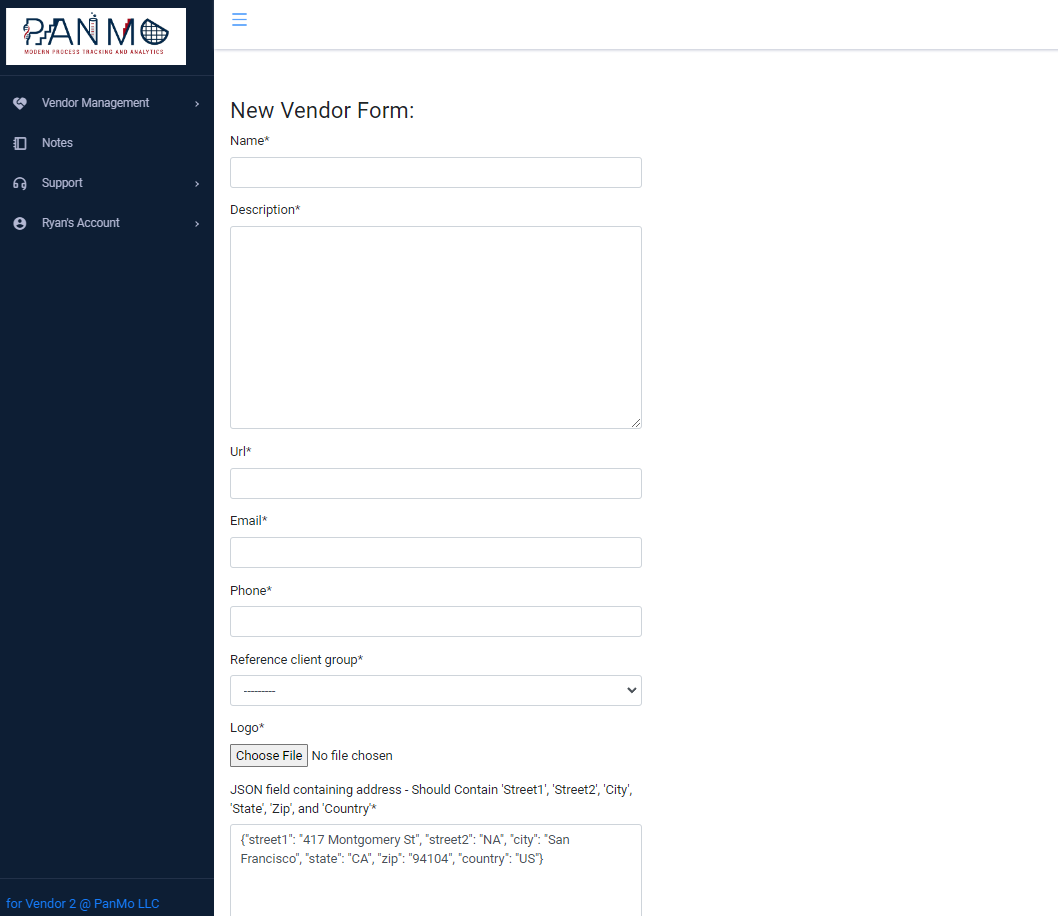
Before creating either a vendor or a client, we need to create the vendor/client group in the admin panel. After creating the needed groups, we can leave the Admin page and go to the Vendor Management section. Assuming this is the first time accessing this section, and you are part of the vendor group, it should direct you to create a new vendor page.
11.2. Vendor
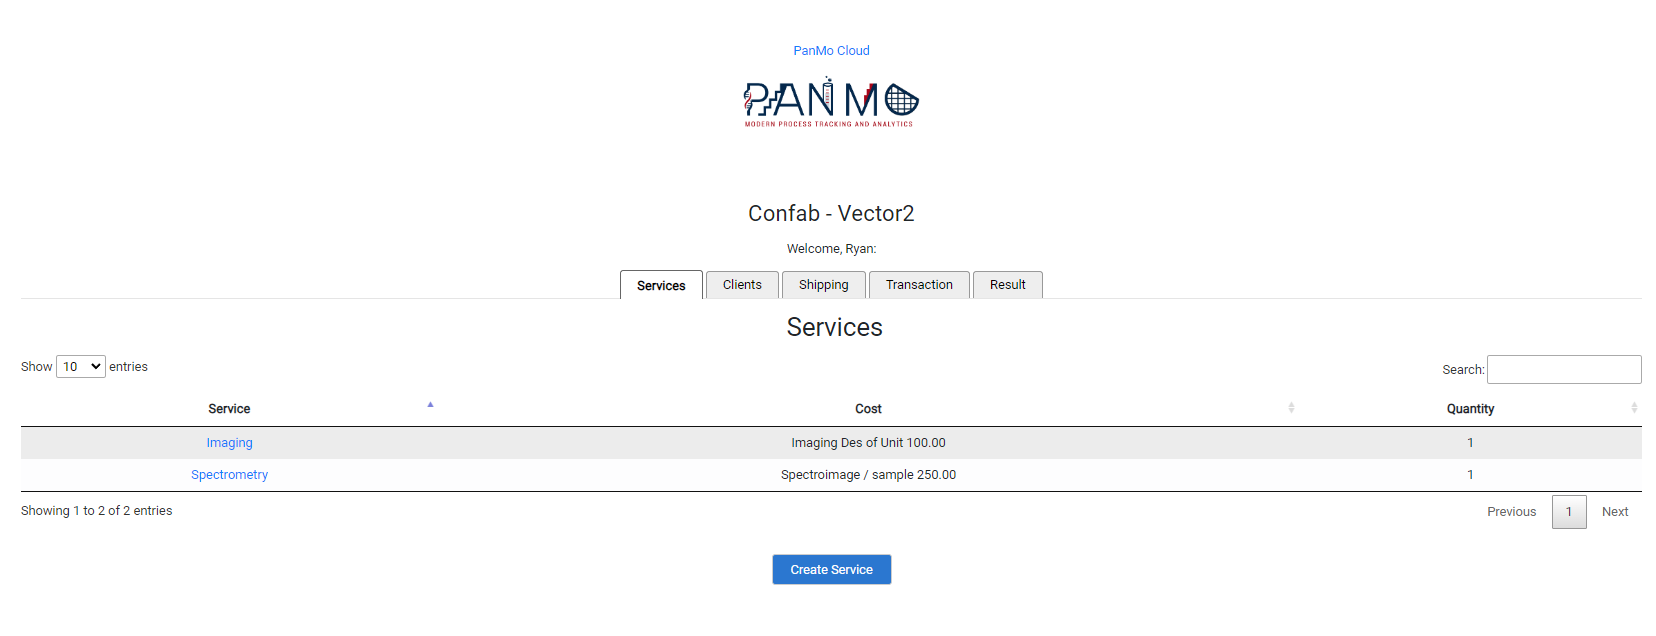
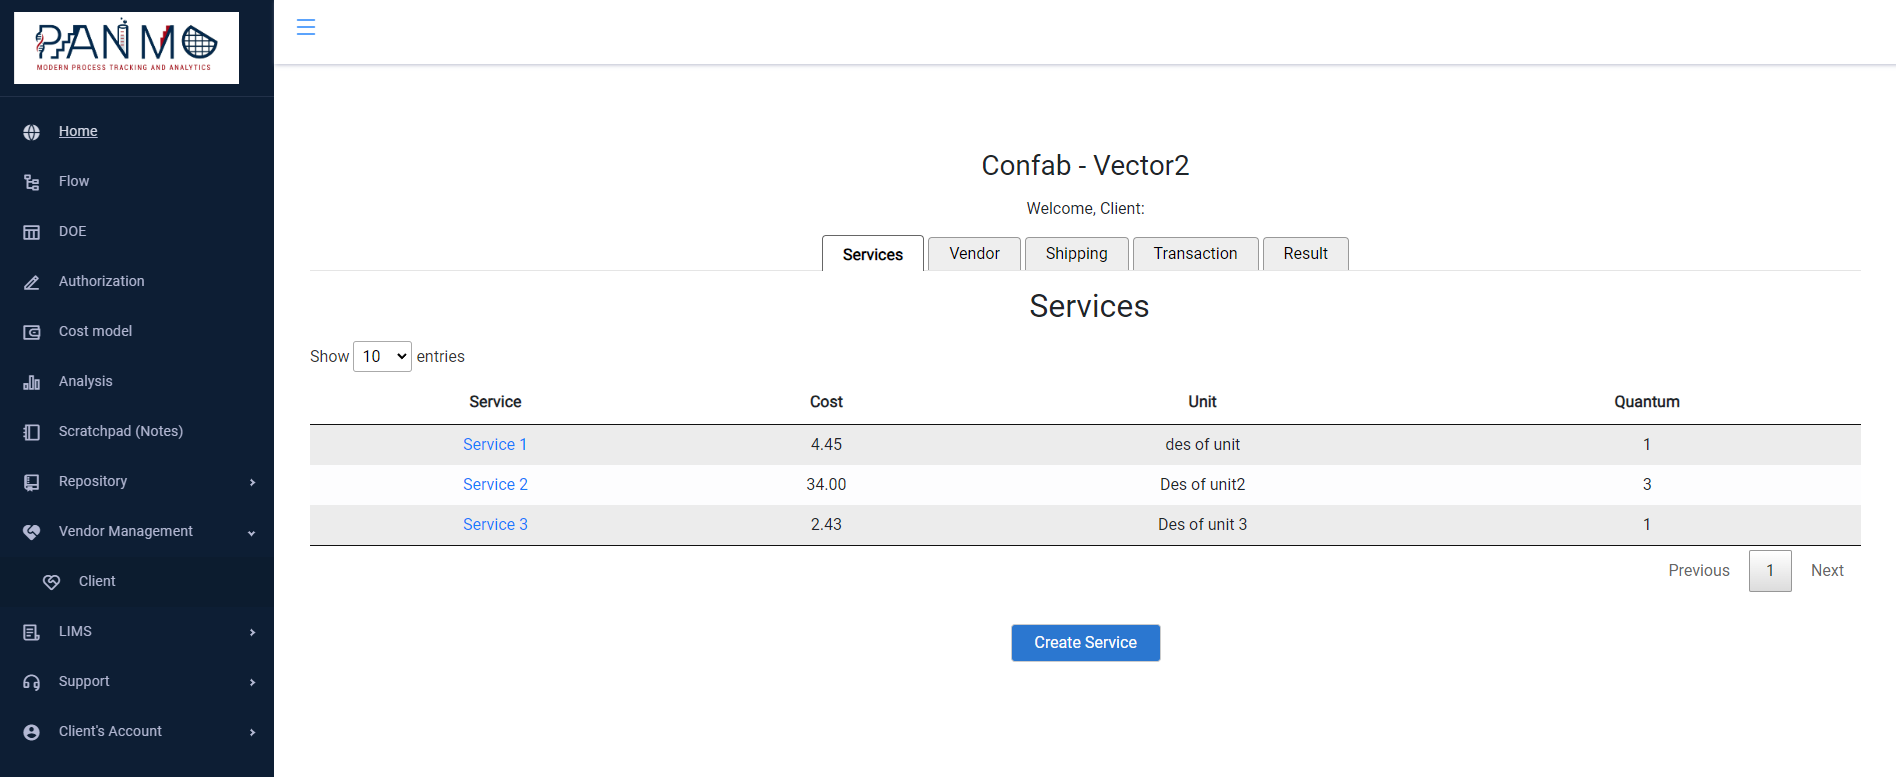
Now that we have done the initial setup steps, lets take a look at our vendor view. As long as the active user signed in is not part of the ‘Client’ group, they should see a ‘Vendor’ tab under Vendor Management. When selected, it will take you to the vendor’s page, starting with the Services tab
11.3. Client
If the active user is assigned the ‘Client’ group, they should no longer be able to see ‘Vendor’ under ‘Vendor Management’, but ‘Client’ instead. With this, they should see a similar view to the vendor with a few key differences
In the Client view, see figure above, instead of the ‘Client’ tab, will be a ‘Vendor’ tab where the client can view the details of the vendor. When viewing the Shipping/Transaction/Results tab, they should also be limited to only the client group they are associated. They should not be able to see results of another client. Last, some buttons will not be visible since they don’t have permission, such as editing a transaction.
11.4. Services Tab
Services are what is offered by the Vendor (you), to the clients. Services tab can be seen in the images above (Figure 4.3 & Figure 4.4)
11.5. Clients Tab
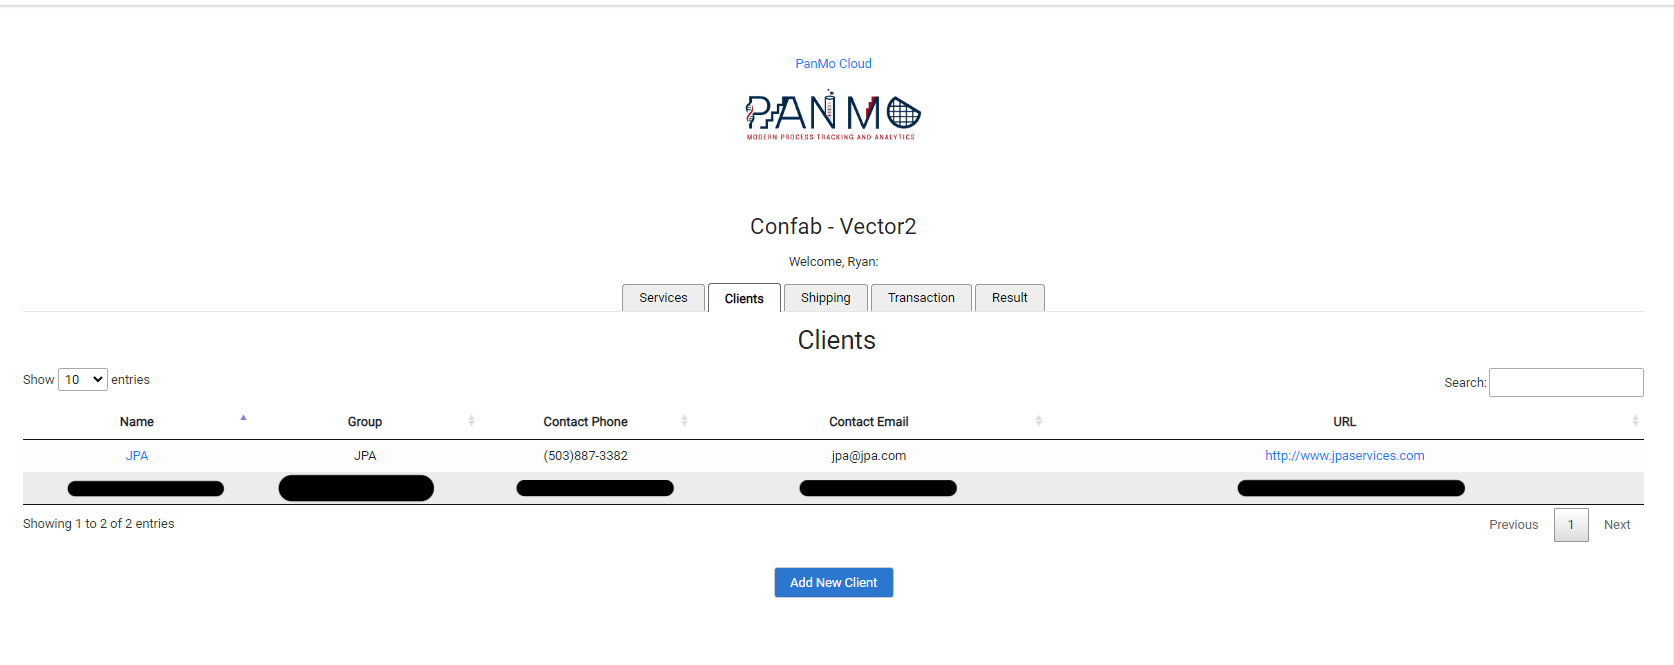
Clients tab, see figure above, will show you a list of all clients you have added to the service. Once a new client is added, a new group will automatically be created for the admin to use. From here, you can add new users to the service, and assign them into the correct client group. This way, they only see shipping, transactions, and results related to their client group. No new permissions need to be assigned to either the client group or user unless you want to specifically assign them new ones.
11.6. Shipping Tab
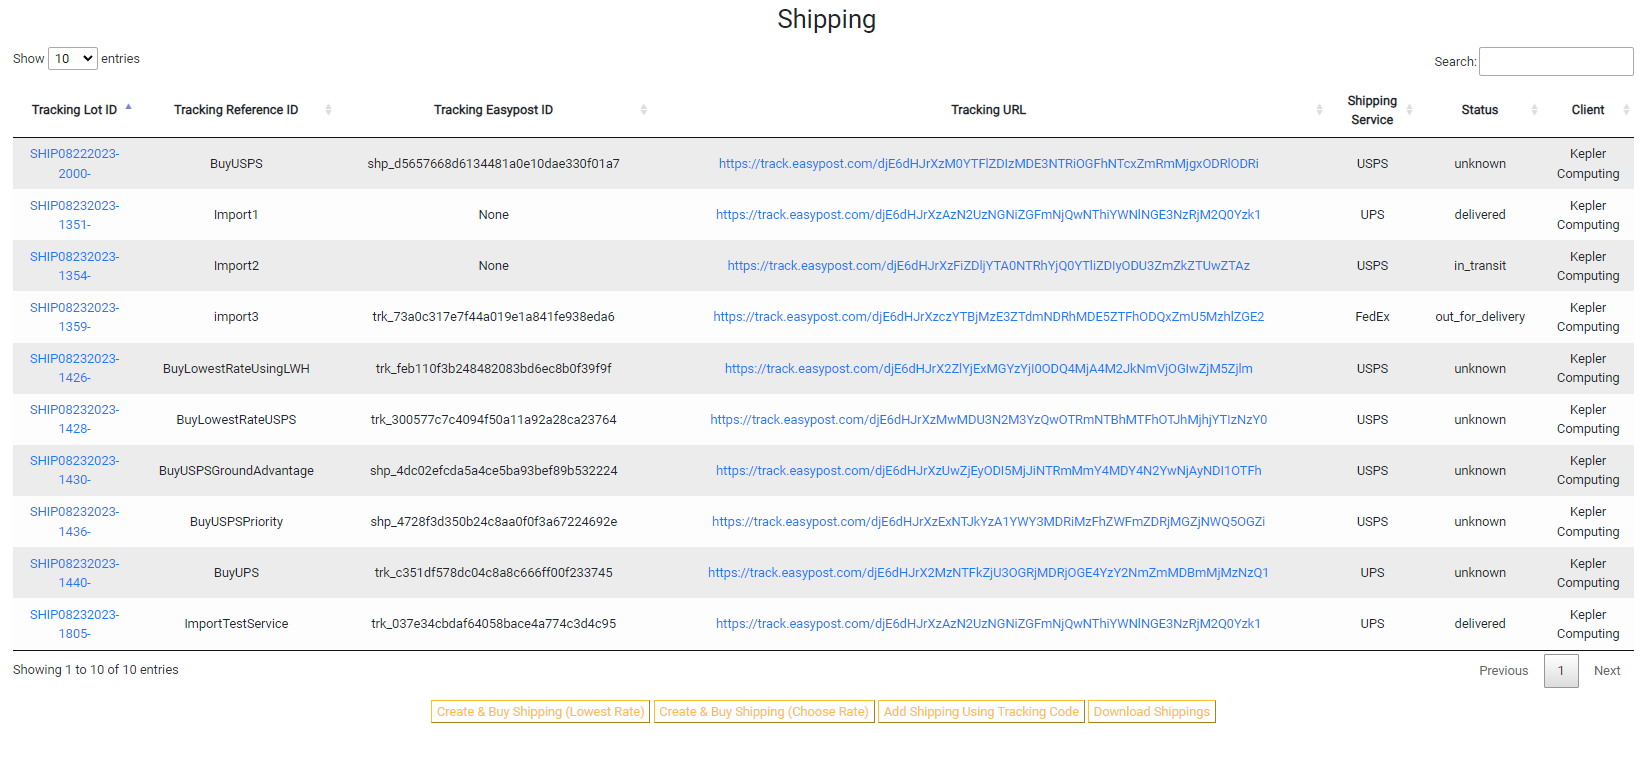
Shipping tab allows you to track packages. This is done using Easypost’s API. Allowing the user to either import an existing package using the tracking code and carrier, or to create a new package with the option of buy using lowest rate or by shipping service level. Using the lowest rate, you can enter the package dimensions (Length/Width/Height) or select a predefined package type. Using the choose rate option allows you to select the service level (Priority, Ground, etc)
11.7. Transaction Tab
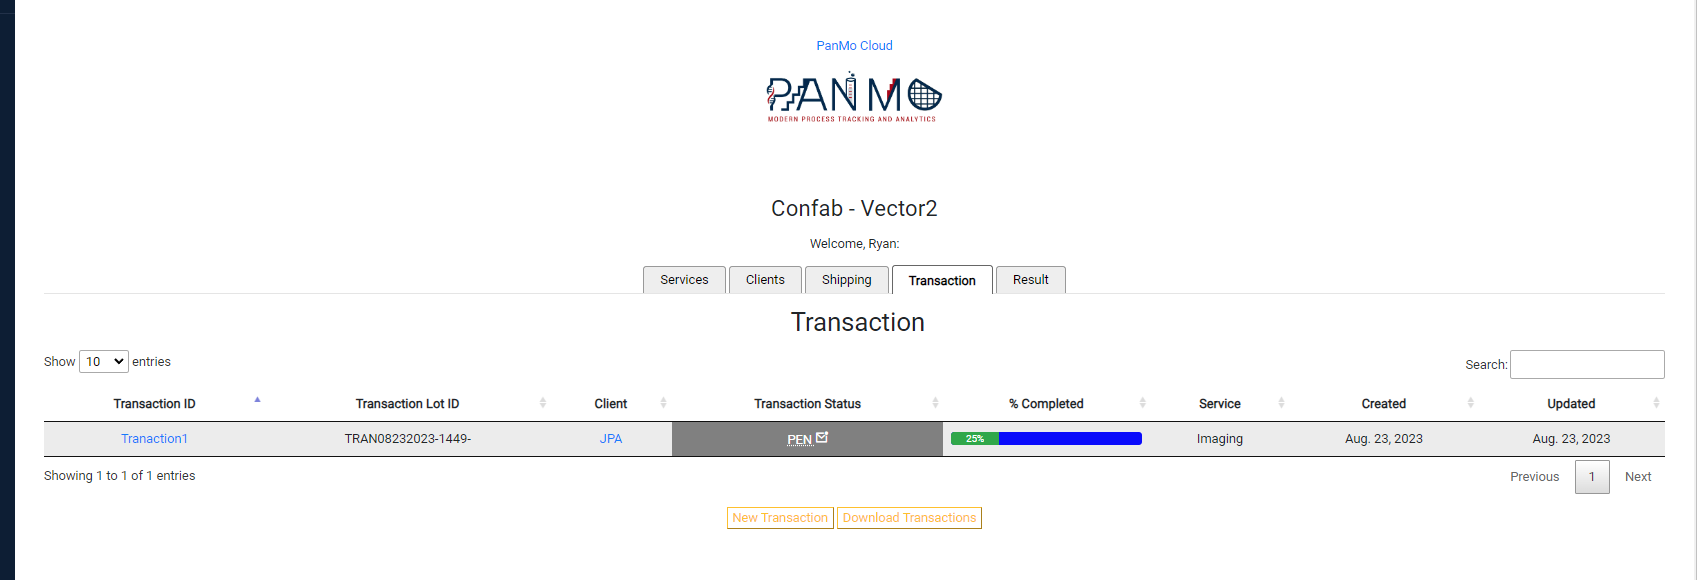
Transaction tab, see figure above, as the name suggest, is used to keep track of transactions between client and vendor. It makes use of the shipping choice used after a shipping label is made. After creating a new transaction, or when updating its status (Pending, Placed, Complete, Etc), a email should be sent out notifying the admin of the change.
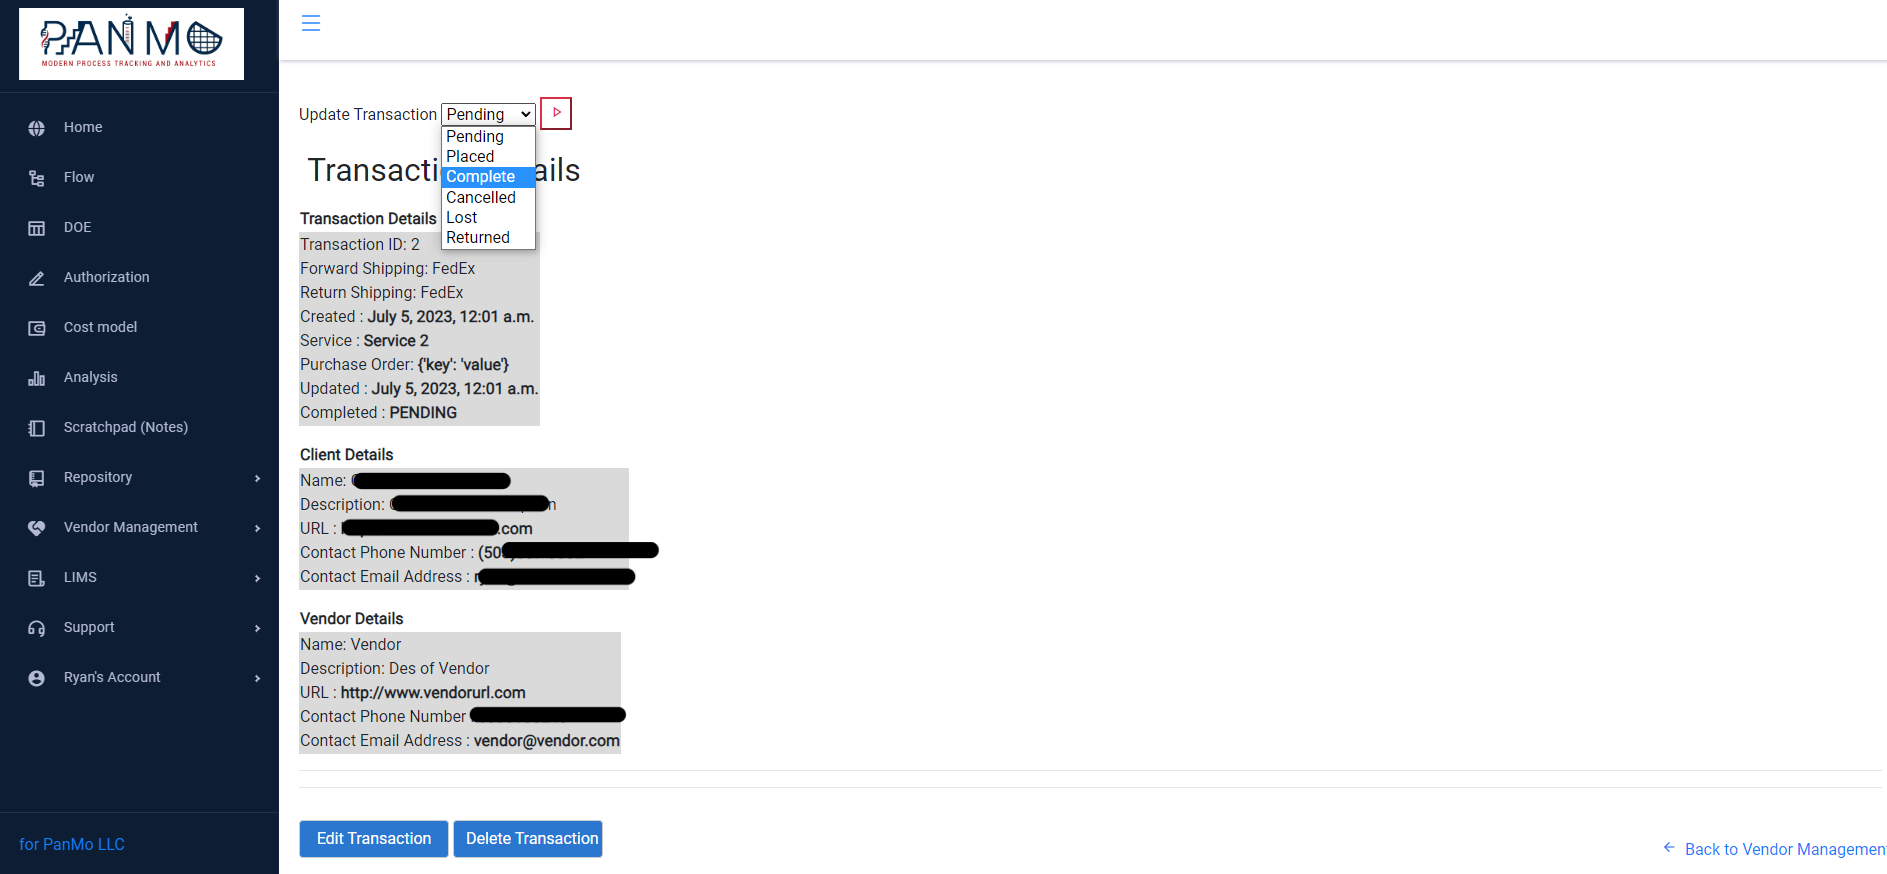
Vendors have the ability to edit the status of a transaction, see figure above, whereas a Client can only place a transaction and will automatically be marked as ‘Pending’ when made.
11.8. Results Tab
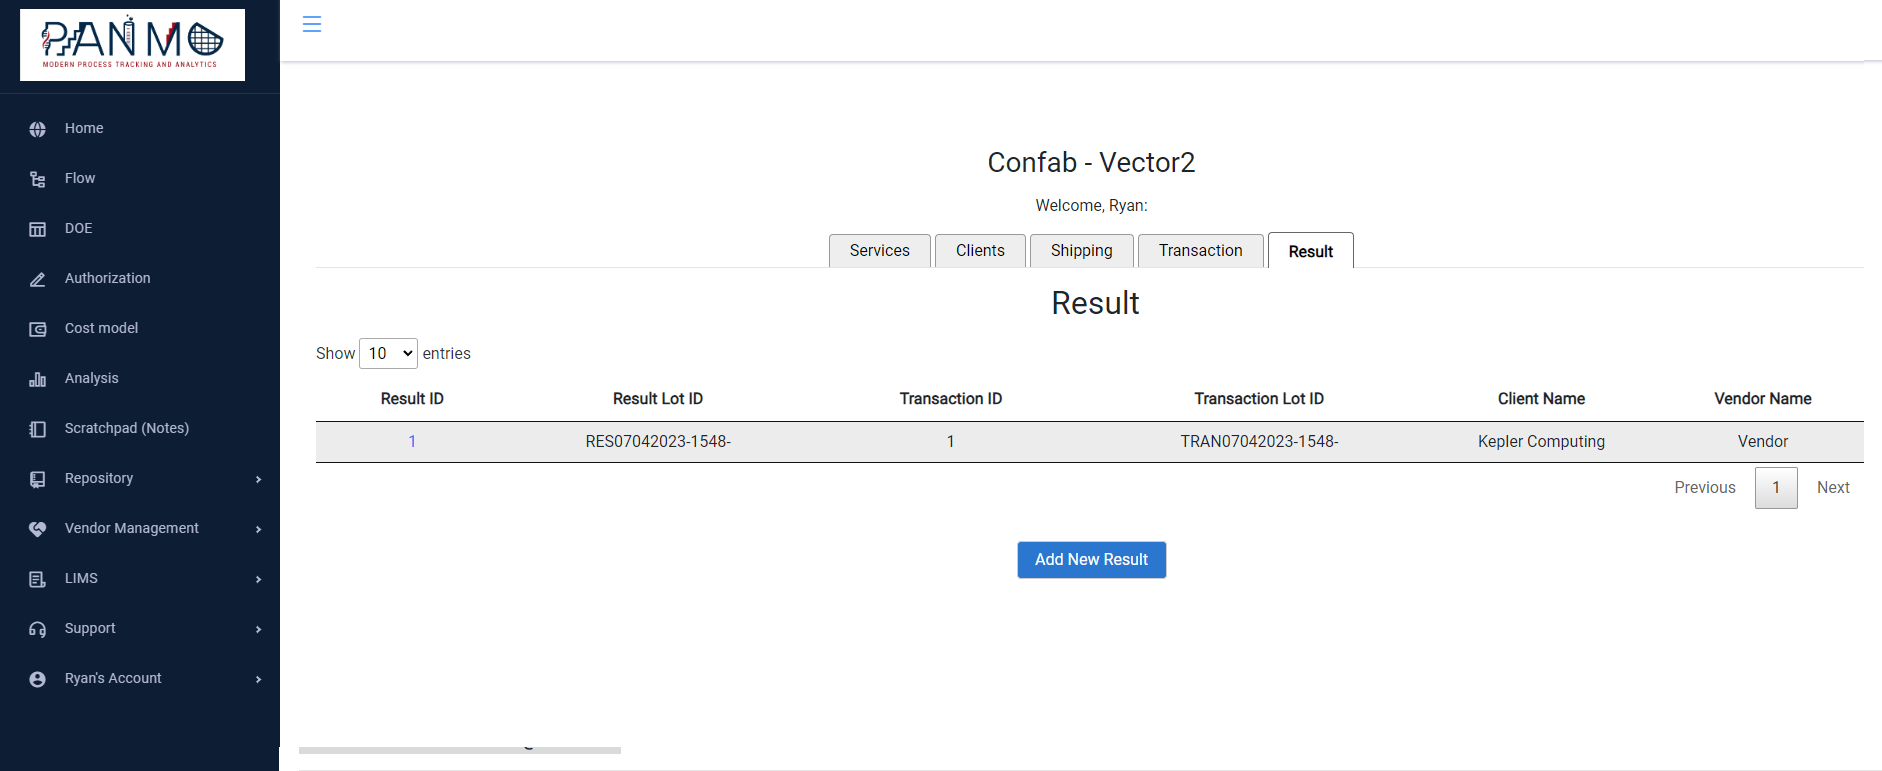
Results tab will show the list of Result objects between vendor and client. The result objects are associated with a document.
When a new result is created, the text in the space labeled “URLs Links to Spaces or S3 bucket*” is used to create a new digital ocean bucket used to store result files. When viewing the result details, a link is provided at the top of the page that opens the result bucket in a new page. As a vendor, you have the ability to read and write in this bucket. A client is limited to read only access