2. Flow
2.1. Terminology
Response measured experimental outcome
Factor an experimental variable that is changed in a controlled manner
Level values at which a factor is controlled (e.g. Temperature: control, ±1.5°C)
Run the combined setting of all factors at which a response is measured
Design set of all experimental runs
2.2. Flow Organizations
Confab provides two ways to organize the flows; for simple (fewer than 20 steps) flows you can use a linear steps to organize the process which is explored in the Cake recipe example below.
2.2.1. Module based Flows
For more complex recipes we recommend using the Module based flows;
The module organization provides a way to collate several process steps inside, while providing the same capabilities for DOE and analysis.

2.2.2. Step based Flows
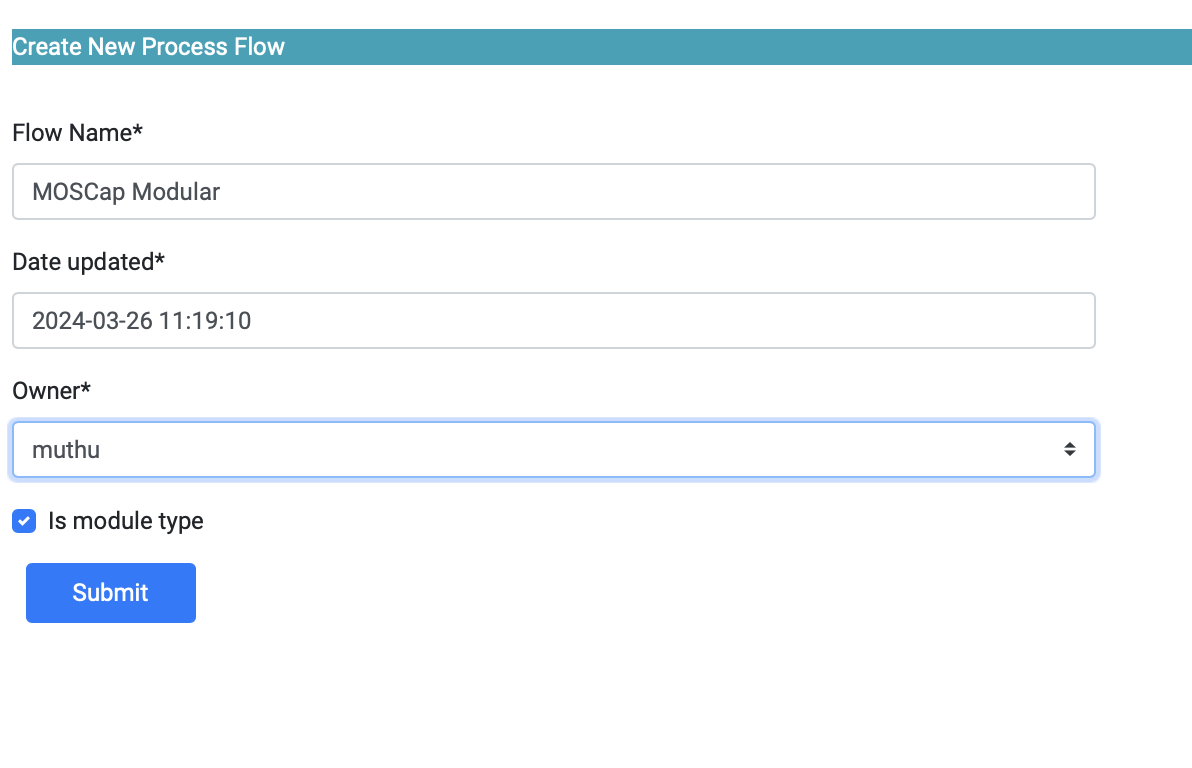
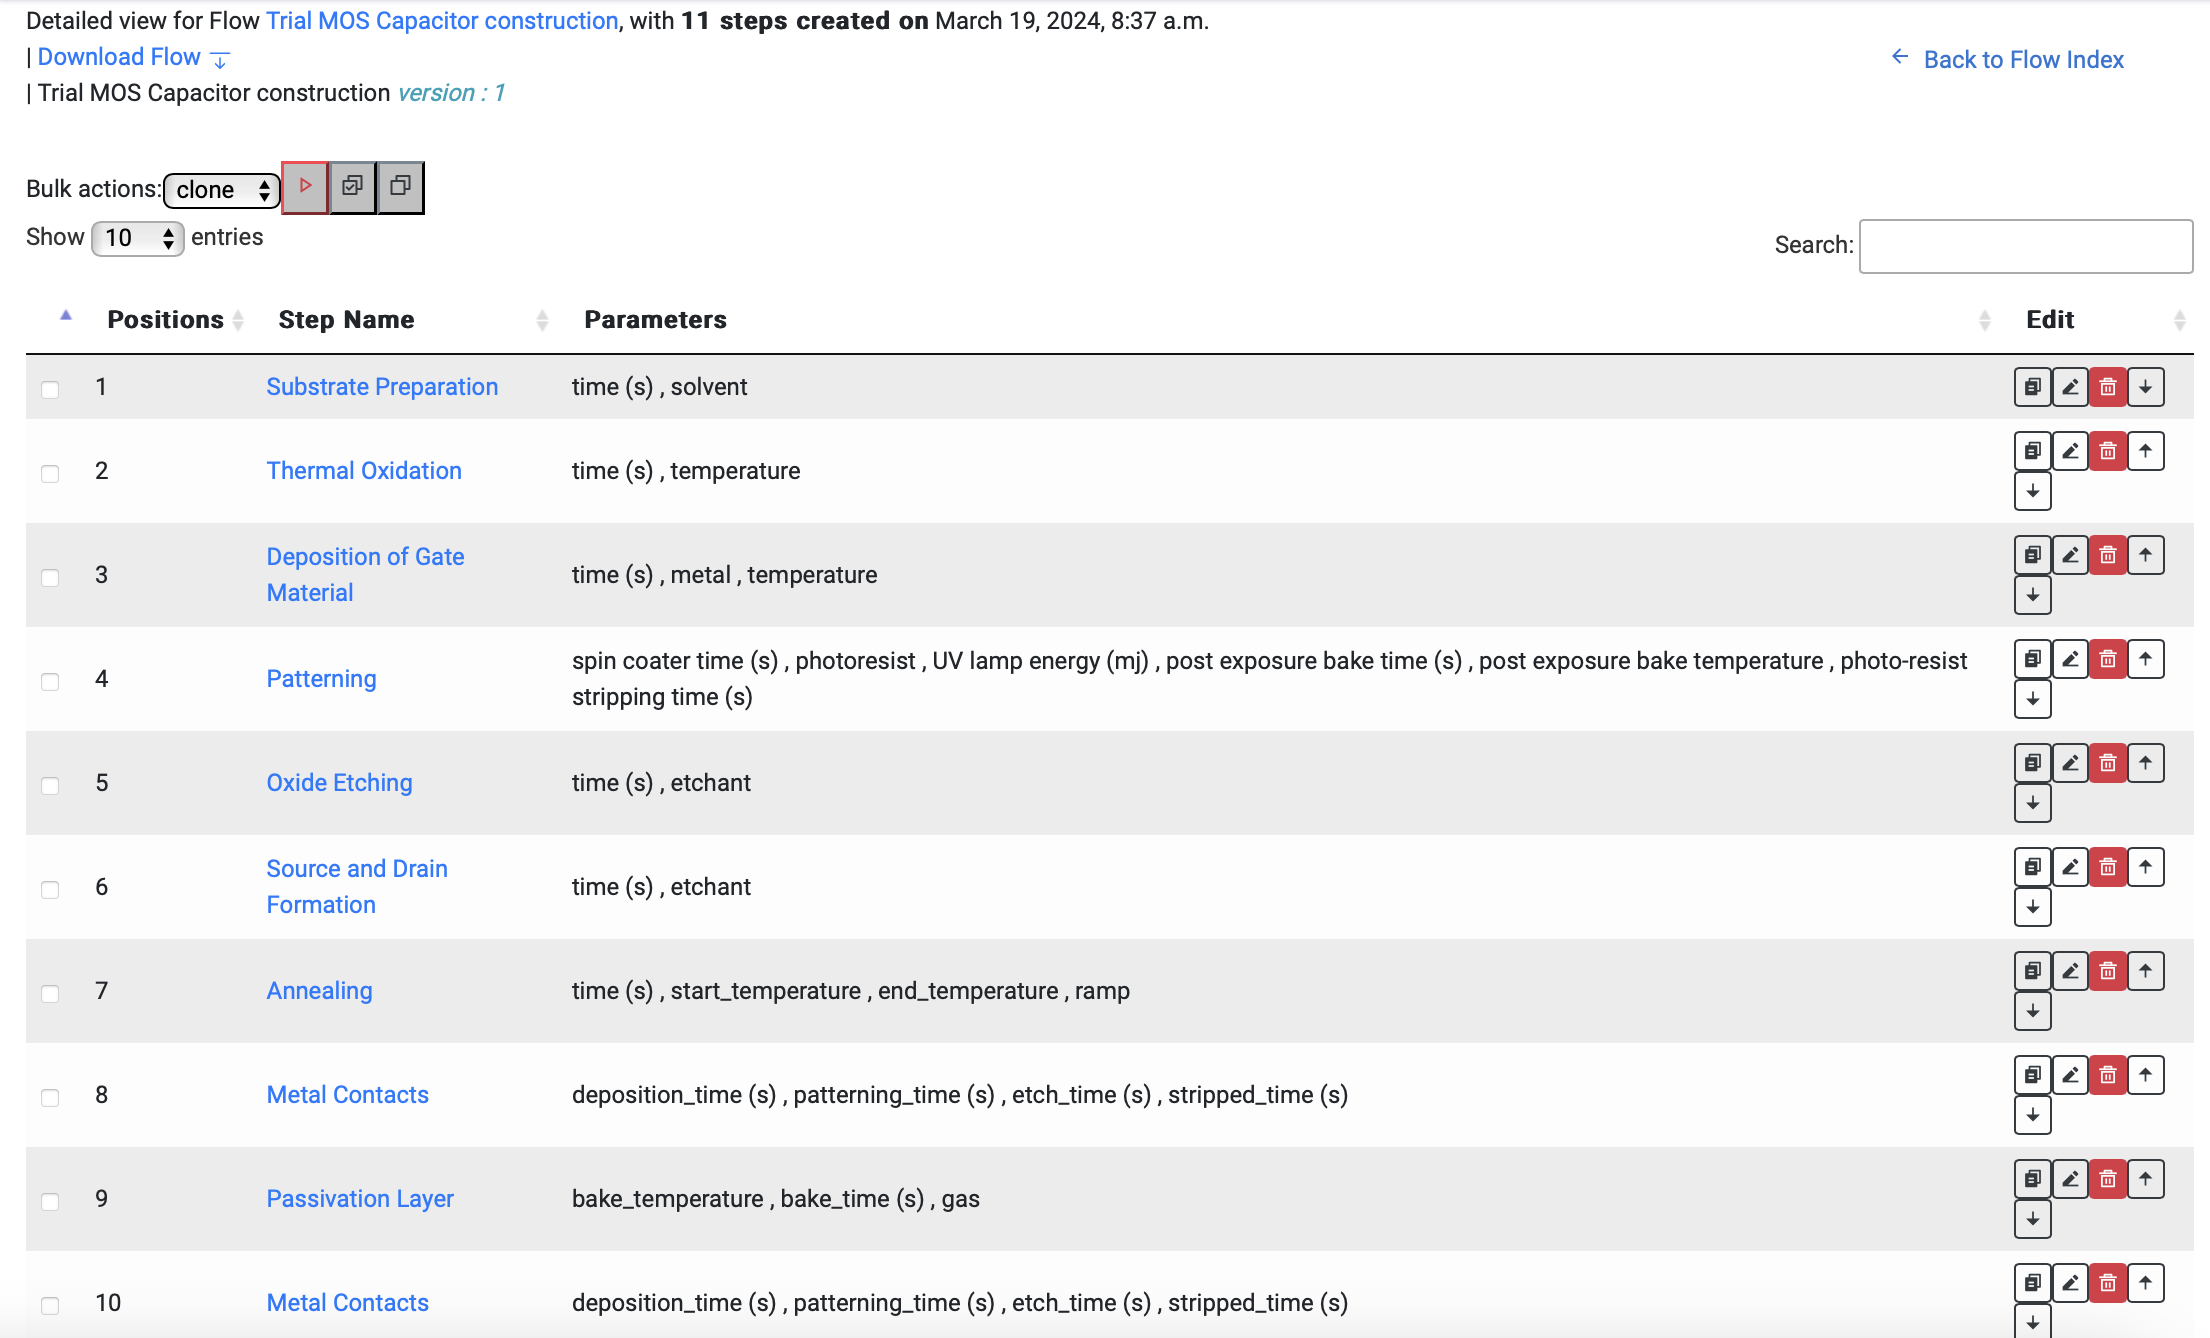
The simple step based recipe is created from Create Flow icon on the Flow menu (keep the “Is module type” unchecked). Once you create the flow you can add steps and parameters to each step; these will be picked up in the flow. The same MOSCap flow is shown in the step-based flow,
2.3. Creating a Flow Recipe
Time to make a cake. Initially, you must have a flow. A flow describes each step of the experiment. In this case, the flow will be each step of making the cake. Click “Flow” here, and then “Create Flow” to begin.

Figure 1.0
This will lead you to a page asking for the name of the flow and the owner of the flow. For our example, we will choose the name cakeTest shown here.
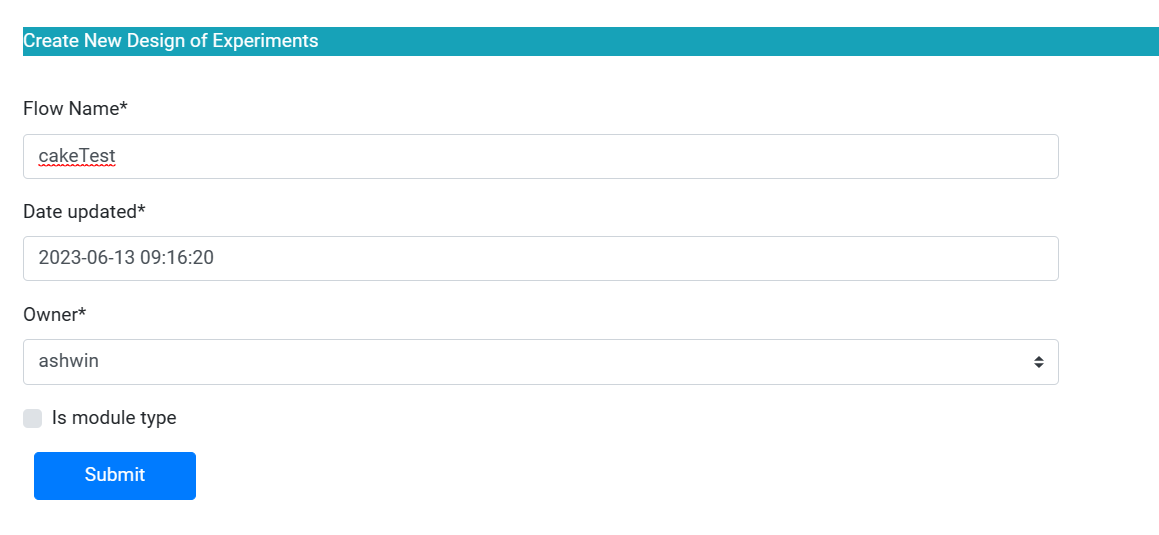
Figure 1.1
2.4. First Step
This is the summary of the overall flow. Currently, there are no steps. To begin creating steps, click “Create Steps” shown below. This will take you to a page which shows the experiment (our cake creation), the name of the step (you choose), kind of process (Foundry, Analysis, Undefined), the relative position (what step we are in), the number of parameters, and the schema description/unit. For this example, input what is shown in the picture below and hit save.

Figure 1.2
The step has been created and will look like this. It needs data in the parameters now pertaining to the step.
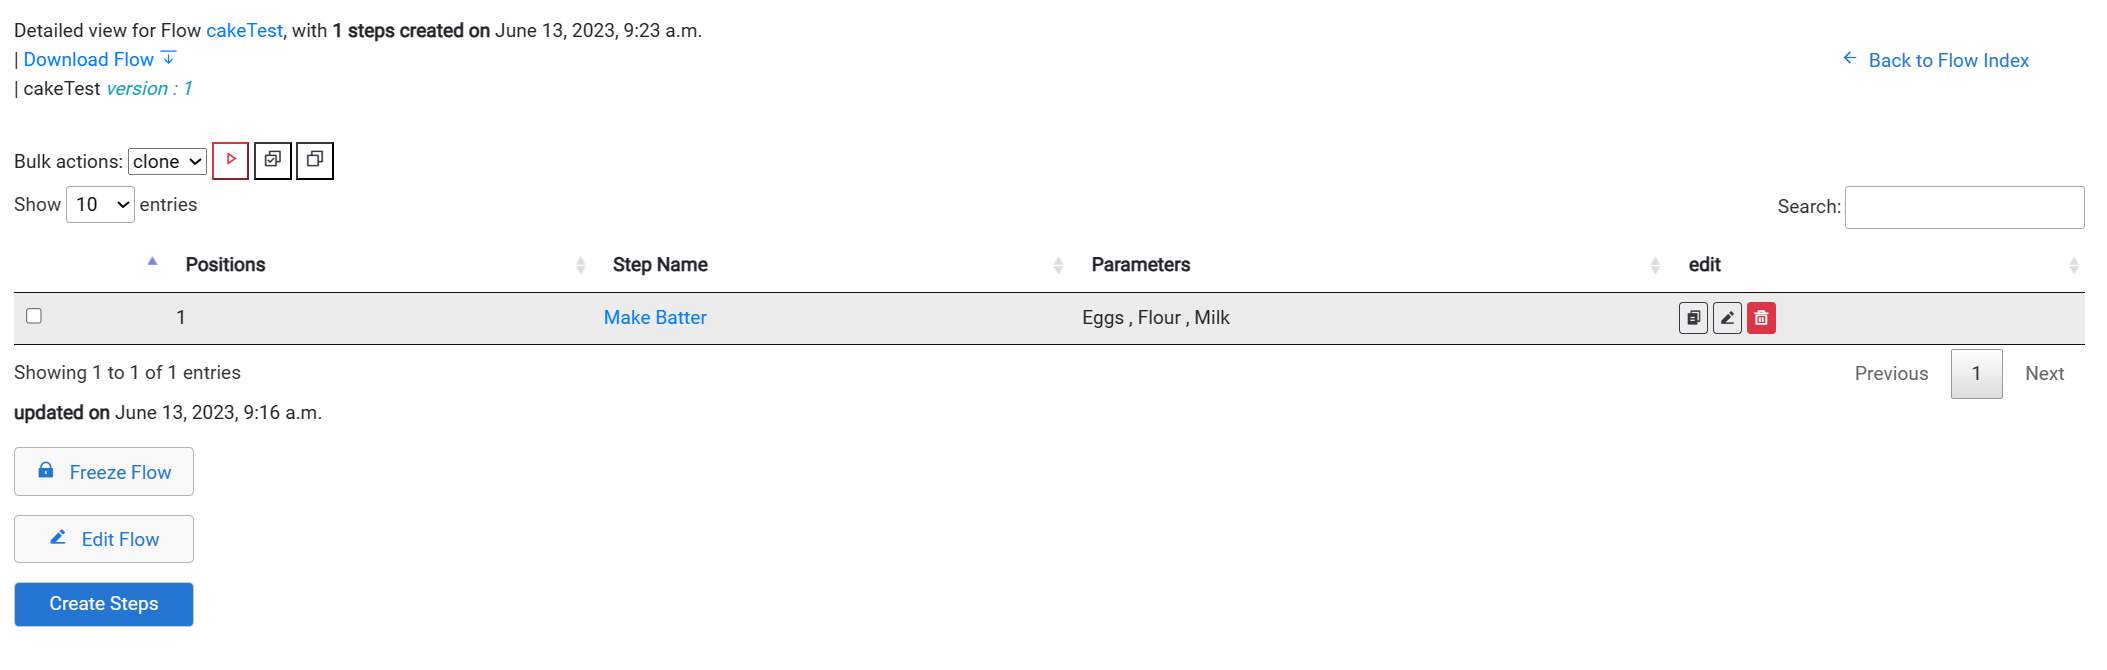
Figure 1.3
2.5. Assigning Parameter Data
To do this, you would click the step name you want to add to, and then click “Add Row”. As you can see, Eggs is the name of the first ingredient, Flour is the second, and Milk is the third. The Unit is the type the description has. For ours we chose Integer for eggs, Float for Flour and Milk. Here you can add how much of the ingredient you want, as well as add notes for how to mix it, how many cups of each, etc.
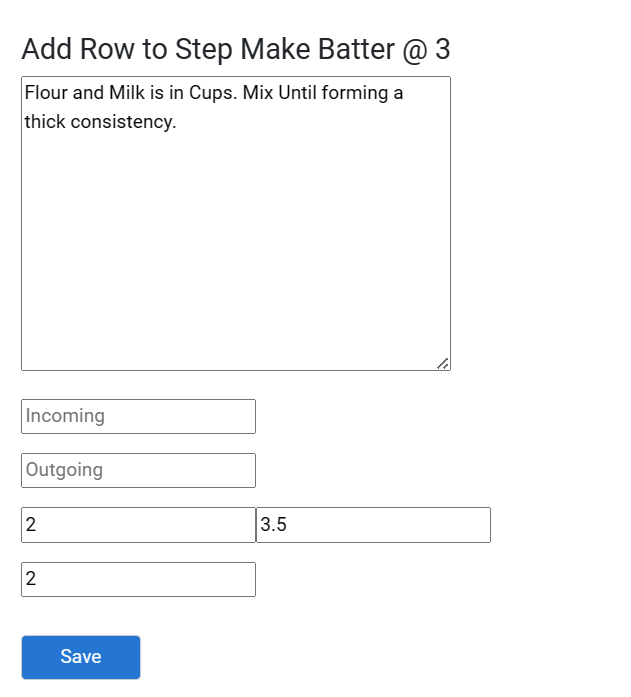
Figure 1.4
It will then look like this.

Figure 1.10
At this point, you can add more steps. For Cake, we will see Bake, Cool, and Decorate added.